Saturday, November 5, 2022

How It All Began

I fell in love with French Hand Sewing and English Smocking when my first daughter was an infant. I've sewn and done simple hand embroidery since I was about nine years old. My first project on a sewing machine was an apron for 4-H when I was nine years old. Both my mother and my grandmother had sewing machines. I still remember the clothing my mother made me growing up. My husband, children, and I spent summer vacations at his parents house. The first summer after my daughter was born, a friend of my mother-in-laws taught me how to pleat, smock, and construct a bishop dress. My mother-in-law (Tommie) purchased a pleating machine and I've never stopped smocking.


I didn't think it was too bad for my first try!


The pleater my mother-in-law purchased for me is still the one I use today thirty-nine years later.


After returning home that summer, I looked in the yellow pages (yes, there used to be a book published listing all the local businesses) and found that Tuscaloosa, Alabama had a smocking and heirloom sewing shop called Sew Fancy. Later the name was changed to Sew So Fancy. I still remember getting my 19 month old and 6 month old out of the van, putting them in their double stroller and wondering how I was going to get them up the stairs of the old Victorian house where the shop was located. Luckily, the owners of the shop saw me and helped get the stroller into the store. A life long friendship began that day between me and those two sweet women, Swiss Batiste, and French lace. 

The world of heirloom sewing was new to me and I desparately wanted to learn all about it. One of the first things I learned was there were two techniques; french sewing by hand and french sewing by machine. French sewing my hand has been used for many generations and uses the finest fabrics and laces so in order for me to try to duplicate the look on the machine, I knew I needed to first learn the technique by hand. 

Lessons were a must as were books by Sarah Howard Stone. 


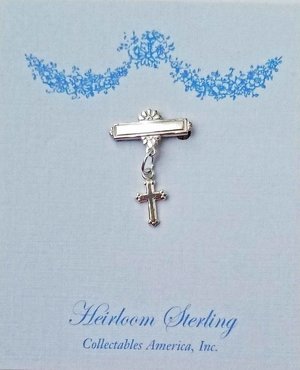
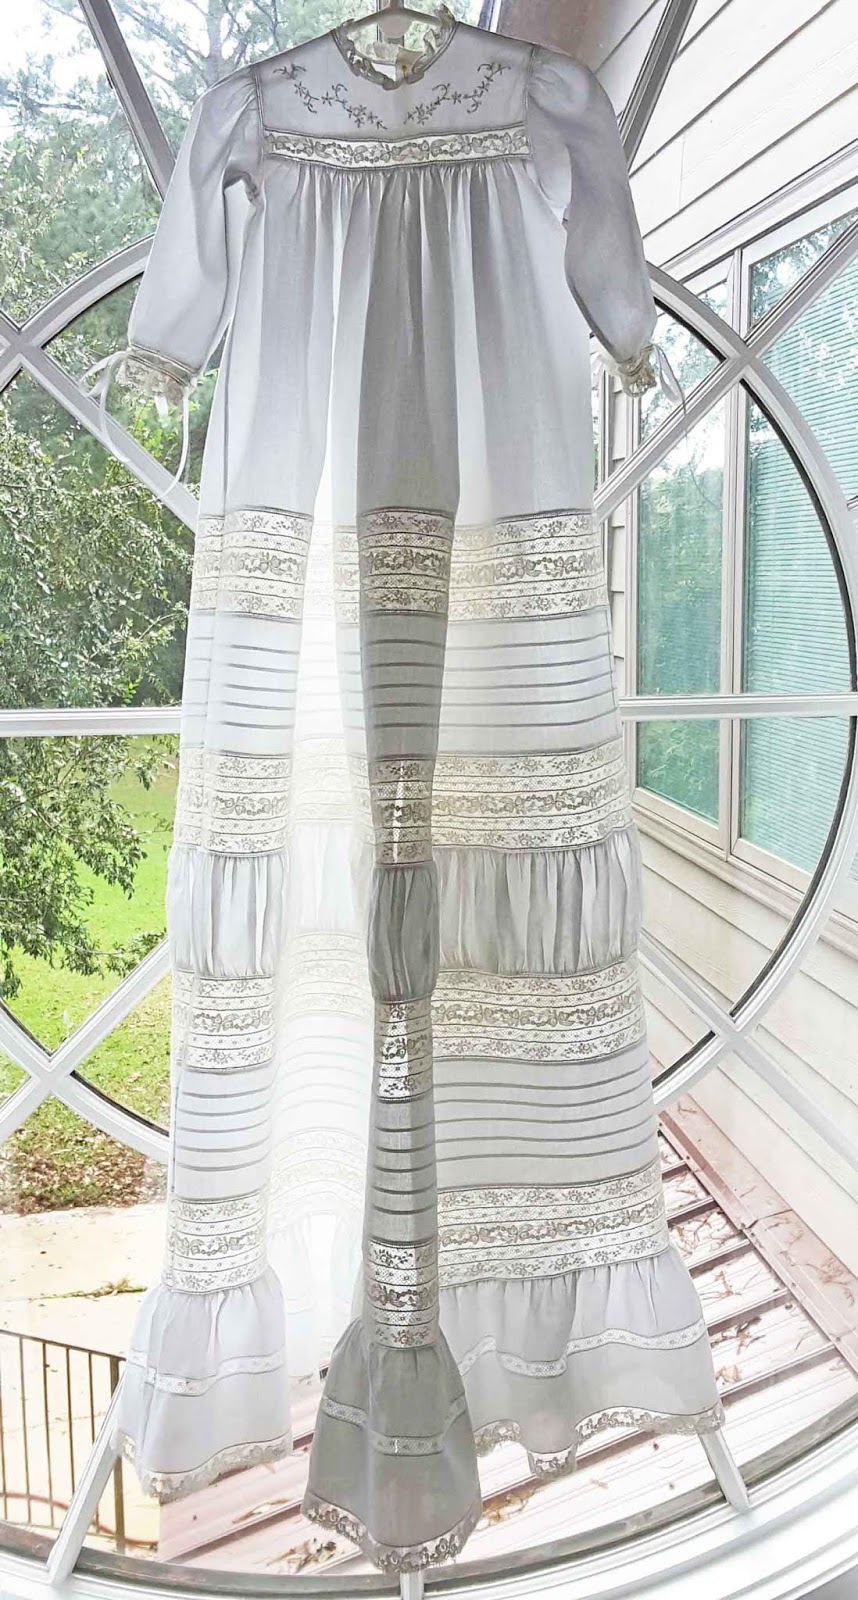
During my class, I learned all the techniques from a great teacher and friend. This was a hands on project so I had to select what I wanted to make. My daughter had auburn red hair so I decided aqua Swiss Batiste and ecru laces would be a good choice. Below are pictues of the finished results.


Note the french seams and hand rolled and gathered skirt ruffle. 


Pattern used was Bijoux by Sarah Howard Stone in a size 1.

I plan to share more of my journey in furture posts.


Pin It!

Thursday, August 13, 2020

Special Wedding Keepsakes

 My niece had a lovely wedding at the beach last Christmas and I had a grand time helping her and her mom create special touches for the wedding. They searched the internet for a ring bearer pillow and couldn't find anything like they liked so they asked me to create one for them. It had been a very long time since I had made a pillow but I got busy! Here is a picture of the finshed product.


I used white Maline lace, white pima batiste, white entredeux, Mother of Pearl buttons, and white satin ribbon.
Here is a picture of the back of the pillow.


An elastic enclosed band  was added to the back so the young ring bearer would have something to hold onto and hopefully not drop the pillow! The body of the pillow measured 8" x 8" and ended up being the perfect size.

The bride also wanted custom handkerchiefs for herself, her mother, groom's mother, plus the groom's grandmother. I decided the father of the bride would definitely need a handkerchief! The female handkerchiefs were made using linen fabric, hemstitching, and french Val lace. The blue thread used coordinated with the bridesmaid's dresses and other wedding colors.


The handchief for the father-of-the-groom was different. I didn't think he would be too thrilled with lace on his handkerchief so I made one of my linen hemmed and hemstitched handkerchiefs. Here it looked and he definitely needed it before and during the ceremony for some happy tears.


When I sent the package to the bride before the wedding, I included a few surprises. I made a lovely set of garters for her to wear. One for her to wear and save as a keepsake and one to wear and throw at the reception.


Something I did for my daughter when she married last summer (another post about it later) was make a custom satin ribbon label for her wedding dress. I thought my niece needed one, too. In addtion to a label for her dress, I made two more labels for the father of the bride and groom ties. She loved the special touch. Again, I used the same blue font font used on the handkerchiefs. I hand stitched them into the garments after I arrived a few days before the wedding.


Below is a picture of everything before it was shipping to my niece. 


I hope you have enjoyed seeing the special items I made for the wedding. Handerchiefs can be ordered from my Etsy shop Monogram Elegance


Pin It!

Wednesday, February 12, 2020

Pink Swiss Batiste Baby Gown and Bonnet

It has been too long since I last posted to Behind The Monogram. I've been busy with life and constructing beautiful heirloom garments. Today I want to share with you a pink baby gown set.


The set is made using a pale pink cotton batiste called Bearissima from Bear Thread, LTD. It is a beautiful fabric and so easy to work on. The laces are ecru French Valenciennes laces. I used my favorite baby gown pattern Babette by Sarah Howard Stone.


Narrow beading is sewn to the front placket and the ruffle is attached with entredeux. The wrist bands are made using narrow beading sewn to the gathered long sleeve and fabric ruffle with entredeux. Tiny 1/8th inch ribbon is woven through the beading holes on the front placket and tied in a bow at the wrists.


Ivory hand embroidery compliments this sweet gown in the front corners and the placket inside edge is stitched down with feather stitching. The embroidery design came from one of Sarah Howard Stone's books on heirloom sewing. Most of my inspiration comes from her books.


The details on the sleeves turned out lovely. Down the center of the long sleeve is a lace band attached to the fabric with machine hemstitching. If you have read previous posts you know I have one of the old - older than I am - Singer hemstitch machines. 


Taking great photographs is still a challenge for me. Some of the pictures turned out too light but hopefully you can still see the detail in the photos. The picture above shows the hand embroidery corner design. It has bullion roses and tiny leaves.


The picture above is a close-up of the from placket detail. There are tiny bullion roses and leaves between the buttonholes. The placket closes with tiny Mother of Pearl buttons.


The back of the bonnet has the same lace band and hemstitching as the sleeve. The crown is attached to the bonnet with hemstitching and gathered lace.


Hand embroidery compliments the front band of the bonnet and ribbon rosettes are attached to each end. The bonnet ties under the chin with ecru stain ribbon. A matching A-line slip completes the set.

This sweet set would make a great Coming Home from the hospital outfit, a great first portrait outfit, or a beautiful baby dedication outfit. I hope you have enjoyed reading about this project and I hope to post more of my work soon.

Have a nice day!


You can see more of my work by clicking this link and visiting my Etsy Shop Monogram Elegance.
Monogram Elegance and of course you can shop for the perfect baby gift at The Polka Dot Store .


Pin It!

Wednesday, December 18, 2019

2018 Heirloom Easter Dress


Easter is a special time of year. Spring flowers are blooming and the weather is getting warmer. Here in the deep south, mothers start planning Easter outfits for their children in January. The design is sketched then laces and fabrics are selected. Planning Easter outfits usually take days not just hours. Magazines and Pinterest are looked at for ideas and details. After a style is decided on then you find a pattern for the style of the dress for girls and shirt/pants pattern for boys. In this article we will talk about a girl's dress. Child measurements are taken to ensure a good fit for the garment. It is also a good idea to measure a garment that fits the child well. After a style and pattern are selected, then mothers need to look at fabrics and laces.

After the style and design of the dress are decided, the lace and type of fabric are selected. French Valiennces lace is available in basically three colors: white, ivory, and ecru. For this dress, the mother selected white fabric and ecru lace. I used white Imperial Batiste by Spechler Vogel for the dress laces from Capitol Imports. The laces came in white and I dyed them with coffee, water, and set the dye with vinegar. There is a tutorial on how I dyed the lace HERE.

Let's talk about fabrics used on heirloom quality garments. Purists will say only 100% cotton or 100% linen fabrics should be used. When "french sewing" was done entirely by hand (more on that in a following paragraph), 100% cotton or linen fabrics needed to be used in order to roll and whip the fabric by hand. Today most French Sewing techniques are done on a sewing machine and you can achieve a similar look using a polyester/cotton blend of fabric. I have garments I made 25 years ago with a quality polyester/cotton batiste and they look just as nice as they did when they were originally made. I will talk more about storing heirloom garments in another post. 100% cotton Swiss Batiste and Linen are still my favorite fabrics to work with when making heirloom garments.

After all the decisions have been made, construction begins. When you first look at a dress this complicated, you might ask, "Where do I start?". Construction of the dress is sewn in steps. I like to make the fancy bands first. This dress has bands of lace insertion and bands of pin tucks. After decided the width of the dress, I carefully measured the lace needed for the bands and cut them. Width of the shirt of the dress is determined by size of the child.

The lace bands are sewn together using a method called Machine French Sewing. Hand French Sewing is done by hand with a needle and thread. Laces were pinned to a piece and sewn together with tiny delicate whipped stitches. Most outfits today and sewn using a sewing machine but the stitches are designed to mimic hand sewing. If you have an old garment sewn entirely by hand, you have a true treasure. In Machine French Sewing, you use a tiny narrow zigzag stitch to sew the lace pieces together. Care is taken not to stretch the lace.

For this dress, I stitched the selections in the following order:
Lace bands
Tuck bands
Skirt Ruffle
Sleeves
Front and back yoke

After all the sections are made, I lay them out on my grid pad and measure to see how deep to cut the fabric skirt piece. I wish I had thought to take a picture of the layout. As a general rule, you want the fabric piece to be at no less than 1/3 of the skirt length. Then the sections are now stitched together. The front and back yokes were made larger than needed and a "grow" tucked was added. The "grow" tuck was stitched with hand stitching so it can be easily taken out the next year and the child can wear the dress another year. Heirloom style dresses are very expensive to made and mother's want to get as much wear as possible. The lace around the yokes were gathered and stitched on my hand. Ribbon was run through the lace beading and tacked down by hand.

A matching slip was made and used under the dress.

Here are close-up pictures of the front and back of the dress:


The back of the dress is closed with Baby Bar Pins. I call them Beauty Pins and you can find them here on my website.


Skirt Detail


Skirt and Band Detail


Sleeve Detail


Dress Front


These beautiful garments are not only used for special occasions like Easter and weddings but are also worn for portraits. 

Here is a picture of the gorgeous little girl wearing the dress. She is adorable and loved her "fancy dress".


Pin It!

Tuesday, March 5, 2019

2018 Christening Gown Ensemble


Creating keepsake heirloom Christening Ensembles are my favorite thing to make in heirloom sewing. It takes hours just to plan the style of the gown and bonnet, what laces to use, and to “play” with the laces to find just the right combination for the fancy bands.
My customer last summer wanted a very elaborate gown made with Nelona Swiss Batiste and French laces. She gave me a budget but let me make all the decisions about the gown. She was a dream customer! Her only request was a puffing strip in the fancy band. After looking through magazines and books by Sarah Howard Stone, I decided on a high yoke gown with a fancy band and ruffle. I put rows and rows of laces together to get the perfect combination. All the laces are beautiful but some look better together than others. When I was happy with the selections, I started measuring the depth of the bands to figure out the depth needed for the fabric at the top of the skirt and for the ruffle. I laid the pieces out on a grid mat to see the measurements


The picture above shows the lace band, tucked bands, puffing strip, and bottom ruffle laid out but not sewn together. It is on my grid table so I can check the height of this portion of the skirt bottom. As a rule, the embellished portion of the skirt should not exceed two-thirds of the skirt length measurement.
When working on an heirloom project, I do it in sections. Usually, I work on the fancy part of the skirt first, then the front and back bodice, and lastly, the sleeves. I get each section completed before I start assembling the gown. I like to work on the dress in this order: fancy bands, skirt, ruffle, front and back bodices, and sleeves.


The strips of lace were joined with tiny narrow zigzag stitches. I kept adding lace strips until I had the band the way I wanted it to look.
Here are the details of the dress:
Pattern: Sarah Howard Stone Christening Gown Pattern
Laces: French Valenciennes Lace, color light ecru, and white entredeux
Ribbon: Ecru Double Face Satin
Fabric: White Nelona Swiss Batiste
The bands in the skirt, ruffle, the front and back yokes, and sleeves are all joined together with endredeux.
The front yoke features hand embroidery embellishment.

White fabric is the hardest to photograph and I struggle with lighting and getting great pictures! I took pictures outside and inside.
The picture below was taken inside with light coming in behind the dress. I hung the dress in front of a large window.


This is a picture with a close-up of the bodice showing the hand embroidery.


The back of the gown features a placket and my customer will use two beauty pins to close the gown. Beauty pins are often passed down with the gown to use for generations.


Beauty bar pins can be purchased here: https://www.thepolkadotstore.com/baby-jewelry 
Gold and sterling silver pins are available.


The skirt band is an elaborate combination of four lace bands and two tuck bands on either side of a wide puffing strip.


The fabric ruffle has a center row of lace insertion and lace edging is attached to the bottom of the ruffle. The fabric in the picture is white but the lighting makes it look ecru.


 Here you can see all the skirt details.


A matching slip and bonnet completed the Christening Ensemble. The slip has a beautiful cross embroidered on the front center bottom. A monogram with Christening date will be added to the slip after the Christening. Unfortunately, I forgot to back a picture of the slip.


Christening gowns are my favorite thing to make. Creating something this beautiful is very fulfilling. I can’t wait to start on my next Christening gown project!


Note: All supplies can be purchased from Granny's Attic. Contact info: grannysheirlooms@gmail.com 
Custom Christening Ensembles are made on request.


Pin It!