Sunday, November 19, 2023

Let's Talk About Slips

 One of the questions I am often asked is, "Does the baby dress need a slip?". The answer to the question depends on the transparency of the dress fabric and the desired fullness. Personally, I like a slip unless your dress is made from a closely woven fabric such as broadcloth or a heavy fabric such as velveteen. 

If you decide to use a slip, the next question might be, "What style slip do I need?". There are essentially four slip styles, each of which I will discuss below.

The simplest slip is an A-Line Slip. 


This slip can go under any style dress but I think it is perfect under a bishop, raglan sleeve, or plain dress embellished with tucks, embroidery, or lace. I use it under my front ruffle gowns and my raglan sleeve gowns like The Kristi Monogrammed Smocked Baby Dress.


The A-Line Slip can be closed on one shoulder with a button or snap but I prefer to use a back placket.

The Round Yoke Slip is a little more complicated to make but well worth the extra time. It can be left plain or adorned with lace.
The slip goes well under Round Yoke Dresses and Smocked Bishop Dresses. 

Slips for Yoke Dresses are one of the most used slips. The yokes can be high yokes, empire or raised waist dresses.
The slip can be plan or decorated as in the picture below.


A variation of the yoke slip is a slip for a front panel dress.

My oldest daughter was in a photo shoot for Creative Magazine year ago in a dress made by me but embroidered by the multi-talented Margaret Land. The dress was made using a raised pattern with a front panel design. As the diagram above shows, you can construct the slip in one of two ways. You can make a slip with a front panel and gathers on either side or you can make a yoke slip and flatten out the gathers in the center. The second picture shows a slip I made for my daughter using the first method.


Lastly, I don't want to leave out slips that show under the dress becoming the bottom of the dress. Below is a picture of in a pink scalloped edge dress with the slip ruffle peeping out from under the dress.


The hem of a slip can compliment the dress with a matching ruffle, hem, tucks, edged lace, or a simple scallop edge. Slips make stunning beach pictures for your little one or even teens. Happy sewing! I would love to see your ideas for the perfect slip.


Pin It!

Saturday, August 12, 2023

Products That Make Sewing Easier As I Get Older

I'm not ancient but I am getting older. Fifteen years of living with rheumatoid arthritis has taught me to look for ways to make my life easier so I can continue to sew the beautiful heirloom garments I love so much. Today I want to share with you some of the products I use to help me aid me in making these garments.


gloves


Hoop Stand 


It is made from hard beechwood and sanded to a fine finish. It can be used as a table stand but I position it between my legs and sit on the base. The adjustable knobs help to get the embroidery hood in the best position for working on the embroidery. Handsfree eases the pressure on my joints plus I think my stitches much neater.


Hoop Stand

Electric Scissors

If I am cutting more than one layer of fabric, I use my electric scissors. They will cut multiple layers at a time speeding up the cutting out process. Batch cutting my pattern pieces is a real time saver. The electric scissors come with two rechargable batteries so there is always one charged to use when the other is getting slow. The scissors are not heavy so they are easy to hold. Plus, they are cordless so there is no cord to get in the way or get cut through. Mine were purchased on Amazon. Click on the link below to find the ones I use. The ones I use are out of stock at Amazon but here is a link to a similiar set.

Electric Scissors


Here is a short video demonstrating how I use the scissor to cut out the hoods for my towels.


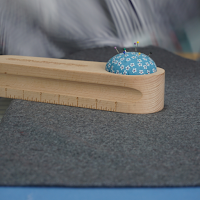
Honestly, my GrabbIt magnetic pincushion has been a staple in my sewing studio or over twenty years. It holds my pins securely and makes cleanup a breeze. I don't use the pins that came with it. 


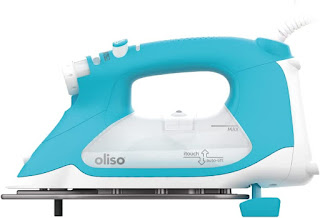
The Oliso Iron ProPlus Smart Iron 

I first saw this iron on a You Tube video. It think it was a video by Sarah Ward with Sarah Classic Sewing. The Oliso has a clever auto-lift function. With a gentle touch on the handle, the iron effortlessly descends, poised for action. Release your grip, and the innovative scorch guards, a patented feature, gracefully raise the iron, safeguarding your fabrics from scorching. Leaving the iron in a horizontal position not only enhances safety but also optimizes efficiency, while providing relief to your wrists and shoulders. It also available in some fun colors!

Olisio Iron


I made a short demostration video on the smart touch handle.


Compact Iron

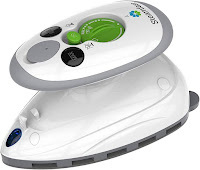
The Steamfast Mini Iron is the compact iron I use everday. It stays on my sewing table while I sew. The grip on the iron is very comfortable for my hand. It's light weight is easy on my hands and arm. The steam function is great and it even has a burst of stem feature. Click on the link and you can see the features of the iron and purchase.


Steamfast Mini Iron

There is another mini project iron I would like to try. It is by Oliso -same brand as my full size iron. I will link it below and provide a picture.


Oliso Mini Project Iron

There are other products I will purchase in the future as I see the need so I can continue doing what I am so passionate about - Heirloom Sewing and Hand Embroidery.

Have a fabulous day,


A small commission is earned off the sale of a product linked in this article.


Pin It!

Monday, July 3, 2023

Sewing Essentials Part 3 - Ironing Essentials

Anyone who sews knows pressing and ironing are an essential part of sewing. Seams have to be pressed to seal in the stitches and then pressed open or to one side. Hems are ironed in and sleeves are steamed. Below are items I use in my sewing studio every day and where you can purchase them.

I. An extra large ironing board the one I use is wider than the normal size ironing board and has a place to rest your iron on one end. It is called the Honey-Can-Do Adjustable Deluxe Ironing Board with Iron Rest

Honey Do Extra Large Ironing Board


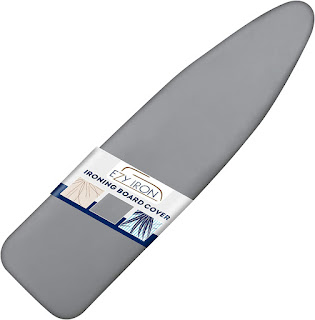
2. I wasn't crazy about the striped cover that came with the ironing board so I purchased one with extra padding. Padded Cover

Extra large ironing board padded cover.


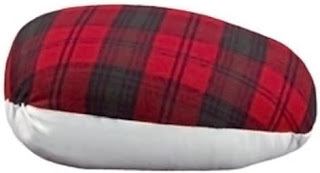
3. My ironing ham is used for so many things like ironing open seams. The curved seams conform to the shape of the ham. There is a cotton side and a wool fabric side.They are acually called a Dress Makers Ham and you can purchase one by Dritz online at Farmhouse.  https://farmhousefabrics.com/pressing-tailor-s-ham-by-dritz-8-28-20

There are also lots of You Tube tutorials on how to make your own.

Tailor's Ham pressing tool


4. The rajah pressing cloth is used to to press in creases or take out creases. The heat of the iron releases a chemical that is like magic. The chemicals won't harm your fabric. I purchased mine and Farmhouse fabrics and here is the link: https://farmhousefabrics.com/rajah-pressing-cloth

The fat quarter silk organza pressing cloth Available at Farmhouse Fabrics is a great pressing cloth. You can use it to delicate fabrics plus it protects your iron from getting residue and sticky spots. https://farmhousefabrics.com/fat-quarter-silk-organza-18-x-22-soft-white

5. Parchment paper is very useful when ironing. It protects your iron and your fabric.

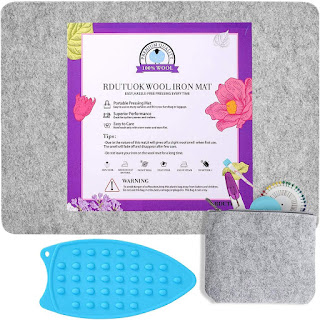
6. I discovered the wool pressing mat while watching a Farmhouse Fabrics Gab & Gush. The heat gets into the wool and both sides of your fabric is pressed. Below are two links where you can purchase a wool pressing mat. Amazon - https://amzn.to/3NtBRQ0 or Farmhouse Fabrics- https://farmhousefabrics.com/wool-pressing-mat-thick

Wool Pressing Mat


7. Now let's talk about starchs. There are several opinions on when and if to use starch on fabrics. I use three types of starch depending on what I am working on. First is Mary Ellen's Best Pressed Starch. This is my favorite starch to use with heirloom sewing. It is light weight and gives a beautiful finish to the garment. 

https://amzn.to/41eFbV5

Eileen's Best Pressed Spray Starch


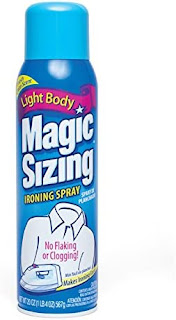
If I use Magic Sizing for "touch-ups". It is a light weight finish and gives so much body to your garment.  https://amzn.to/4498xpg

This image shows a can of Magic Sizing spray starch.


Faultless Starch has been around for years and is a trusted brand. There are several types but I like the gold can the best. You can find it at grocery stores and big box stores but I usually order several cans at a time and purchase it through Amazon.  https://amzn.to/3JGuyUa

Two cans of Faultless Spray Starch

Thank you for staying until the end of this post. I hope my suggestions help you in your sewing journey. I am an Amazon affiliate so if you order from one the Amazon links in this post, I receive a small commission. Have a great day!


Pin It!

Saturday, May 27, 2023

Sewing Essentials Part 2

This is the second part in the series Sewing Essentials. In part one, I talked about my iron by Oliso. Today I want to share with you the other irons and ironing essentials I use in my sewing almost every day. You might ask, "Why do I use more than one  type iron?". Different irons are for different projects and I will explain how and why I use them.


First, is my Mini Cricut Press. Yes, it isn't just for ironing on vinyl! 

It is great for ironing open seams. It is 110V. Power: 150W. Heating plate size: 1.9"x3.3". Auto power-off after 15 minutes no use. I love the auto power-off feature and the pretty raspberry color. Mine is blue!

Cricut Mini Heat Press


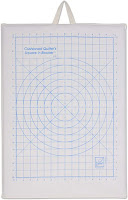
My June Tailor Cushioned Mat make a great small ironing surfacesurface beside my sewing machine. I can quickly press open a seam or block my smocking pleats. The one I use has a smocking block guide on one side and a diamond and scallops shape guide on the other side. It is no longer available but this one Amazon will also work. 

An image of the June Tailor Quilter's Cushion Block Mat

It took me thirty years of sewing before I discovered the Clapper notion. Jeanna Hannah from Blue Ribbon Heirloom Designs used her Clapper in a video and I knew I had to order one from her website.
I will link the Clapper in the picture and then underneath I will type the link to her video. In her video she demonstrates how to use the Clapper.

An image of the Tailor's Clapper by Jeanna Hannah
https://blue-ribbon-heirloom-designs.thinkific.com/courses/tailors-clapper-instructional-video

It is a challenge to short puffed sleeves beautifully ironed. There are several methods I have sed in the past but I achieve the best resulted with my Vin Max Puff Iron. It is no longer available but I found one on Ebay and will link it below for you.

Image of a Vin Max Puff Iron

Be very careful when using this iron. Always keep your fabric moving or it will scorch your fabric!

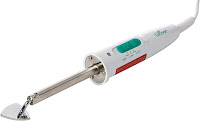
Occasionally I use this tiny iron when sewing. It is the Clover Mini Iron.
An image of the Clover Mini Iron

The iron I use in my camper is a mini steam iron and it is great. There was a recall on some of the older models but mine was not listed in the recall. I purchased it off Amazon.

Mini Travel Iron

It doesn't take up much space and I also purchased a handy travel case for it.


How did I sew for so many years and not know I needed a sleeve pressing board? I use this all the time when sewing during camping trips. It is lightweight, folds flat, and is easy to store. I first saw a demonstration using this board on a Facebook video by Jeanna Hannah of Blue Ribbon Heirloom Designs. A link to this video is posted below the image.

Sleeve Ironing Board


Click this link to my Instagram reel demonstrating my use of the board and iron.


There are many more notions I use while sewing. I'll talk about pressing cloths in another post. All images have a link where you can purchase the item shown in the image. Have a great weekend! 

Note: As an Amazon affiliate, I make a small commission of anything you purchase from an Amazon link.


Pin It!

Saturday, May 20, 2023

Different Types of Elastic and How They are Used

If you are like me, it is confusing to know which elastic to use for sewing projects. Hopefully, the following will clear up some of the confusion. It starts with an explanation of elastic and then gives examples of four types of elastic and where they would be used.

Elastic is a flexible material frequently used in a variety of products. Elastic comes in a number of diff erent varieties, each having special qualities and uses. Fibers are interlaced to form a sturdy and long-lasting fabric to produce woven elastic. It has exceptional elasticity and a snug fit, and is frequently used in clothing, belts, and upholstery. By weaving together numerous rubber or latex strands, braided elastic is created, which is robust, light, and extremely stretchable. It is frequently used in sleeves, waistbands, and other areas where comfort and flexibility are crucial. Swimsuit elastic is made especially to survive exposure to chlorine and water, keeping its elasticity and shape even when wet. It frequently appears in swimsuits. Below are examples of elastic types and their uses.

Woven Elastic:

  • Roll and twist resistant elastic; great for waistbands
  • It is suitable for waistbands, sleeves, necklines, legbands and more.


Braided Elastic:

  • Braided elastic is shrink resistant and unaffected by chlorine and salt water.
  • Braided elastic is often inserted in to a casing but it is also suitable for stitching directly to the fabric.
  • Use with light to medium weight fabrics
  • Machine washable and dryable in temperatures up to 200 degrees F

Knit Elastic:

  • When it comes to selecting the ideal fabric for your kids' clothing, factors such as comfort, breathability, and safety are of utmost importance.
  • made with polyester silk and natural latex rubber making it breathable with a comfortable feel.
  • offers excellent stretch with long-lasting elasticity guaranteed not to loosen over time.
  • us for pajama pants to sportswear, skirts, and necklines.

Swimsuit Elastic:

Swimsuit elastic refers to a type of elastic material specifically designed for use in swimwear construction.It is a flexible, stretchable component used to provide support, comfort, and a secure fit in swimsuits.

Swimsuit elastic is typically made from a combination of synthetic fi bers, such as spandex or elastane, which possess excellent elasticity and resistance to degradation caused by exposure to chlorine, saltwater, and sunlight.

  • The elastic is often sewn into the edges of swimsuit fabric or incorporated into waistbands and leg openings to ensure the swimsuit conforms to the body and maintains its shape during movement and water activities.
  • Available in clear, colors, and cotton.


Sally from Farmhouse Fabrics give a great presentation on the types of elastic in this You Tube Video:

Sally Explains Elastic

If you have never watched Sally on Gab 'n Gush on Tuesdays and Fridays, please watch. I think you will enjoy it. Sally is the owner of Farmhouse Fabrics. Farmhouse Fabrics is an ecommerce fabric and notions store with thousands of selections. Here is the link:

Farmhouse Fabrics

For people with with latex allergies, there also elastics available. Other elastic types to explore are elastic thread, elastic thread looks, elastic in colors, decorative elastic. There are seemingly endless types of elastic. With some research, you can find the perfect type for your project.

Happy Saturday!


Pin It!

Saturday, April 29, 2023

Sewing Essentials Part One

 As a sewing enthusiast, I have my cherished notions and equipment that I rely on time and time again.Today, I want to share a selection of my personal favorites, some of which I consider essential and others that have proven to be valuable additions to my sewing studio. It's worth noting that these items represent just a fraction of my collection, and in future posts, I will delve into greater detail about all the different items within each category.
To start, let's talk about my trusty iron. Given the amount of ironing and pressing I do with sewing, I tend to go through irons rather swiftly, experimenting with various brands along the way. Since my iron tends to be in use for most of the day, I always opt for one equipped with an automatic shutoff feature. Allow me to introduce you to my latest iron, which has quickly become a favorite in my collection. Its performance has impressed me, and I truly appreciate its features!

Oliso Smart Iron

As you can see from the picture, it is by Oliso and it is a smart iron. It's unique feature lies in the soleplate, which is capable of ascending and descending with a simple touch of the handle. Click here to go to Amazon and purchase. https://amzn.to/3ABpLyu

Nest, is my favorite and most used scissors. In my humble opinion, Gingher brand scissors are the best on the market for sewing. I really like this pair with the lock on them. They are so comfortable to use and cut with precision!


They are spring action. I purchased mine off Amazon and here is the link: https://amzn.to/427zYOH

Next up on my list of must-have sewing essentials if a seam ripper. I've owned different brands but my favorite is by Bernina. 


Several places sell them online and I don't remember where I purchased mine but here is a link to a place online that sells them. I buy multiples!

https://stitchinheaven.com/products/bernina-seam-ripper-006993-52-1?variant=39728155328572&variant=39442612781116&currency=USD&utm_medium=product_sync&utm_source=google&utm_content=sag_organic&utm_campaign=sag_organic&gclid=Cj0KCQjwgLOiBhC7ARIsAIeetVAY1Gly3_Ad-nUwcjQamv6QuGLjnxNmivu5lggr7Gm3Iak4zJWcJdcaAvcFEALw_wcB

My cutting table is where all projects start. I purchased it and the mat many years ago from JoAnn fabric store. 


The cutting mat is sold separately.

I found this one on Amazon that I like better and it has a grid top. It looks like you have to purchase a self healing mat separately. https://amzn.to/42dnMw9


Don't you just love the shelf and cute baskets!

Here is a self healing mat that should fit the top of the table.


There may be better options for the mat. Mine has lines for bias that I use often. Anyway, here is the link in case you want to check it out for yourself: https://amzn.to/3HqJTqS

Thank you for reading my blog. I will continue with Sewing Essentials Part 2 soon.


Note: I am an Amazon affliate and make a small commission of purchases.

Click on the buttons below to LIKE & FOLLOW me on social media.

facebook button 
Instagram button


Pin It!